Introduction
An ISO file is an archive, or “image” file. ISO files may be created from groups of files on a hard drive. The ISO image maintains the original file structure while zipping or compressing files contained in the image to save disk space. ISO is an acronym for the International Organization for Standardization. Originally, the ISO file was specified as ISO9660 as the file system standard for a CD. The name ISO has come to include DVD image data as well. Free Burning Studio allows you to make ISO image from your files & folders to backup all the important data.
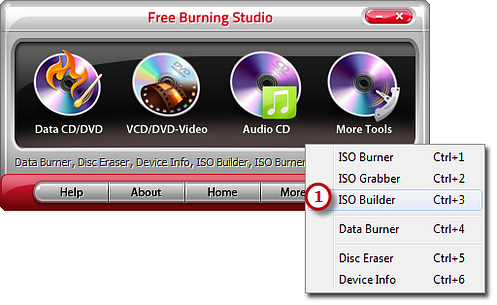
Step 1. Activate ISO Builder
Launch Free Burning Studio. Click “More Tools – ISO Builder” to run the builder wizard.

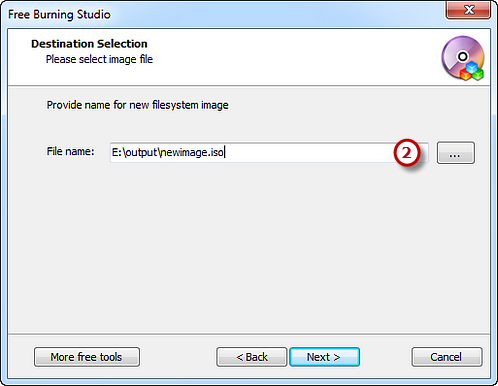
Step 2. Specify the ISO to Output
You should specify the ISO image path and filename. Choose the way the data is stored on disc.

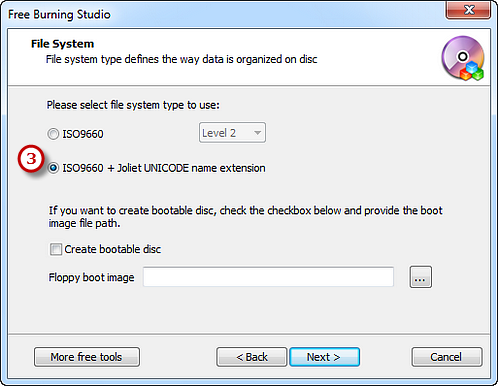
Step 3. Choose File System
You can select ISO9660 or ISO9660 + Joliet UNICODE name extension. Also, you can create bootable disc if you want.

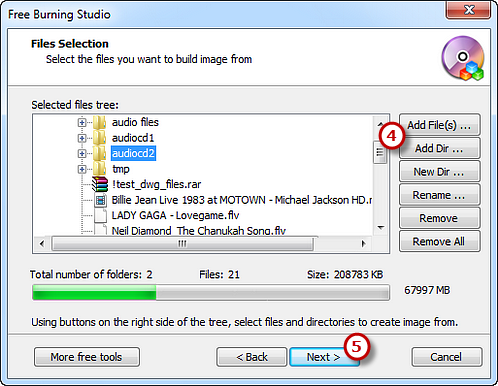
Step 4. Add Files & Folders to Make ISO
Click “Add File(s)…” & “Add Dir…” to add files & folders you as needed and use “New Dir…” or “Rename Dir…” to create or rename the folder. Also, you can remove one or all files & folders by “Remove/Remove All” button. Click “Next” to start creation. Please be patient now! The ISO creation will be completely finished after the process bar reaches 100%.

